| 0 comments ]

Refer to http://vuksan.com/linux/dot1x/802-1x-LDAP.html

This HOWTO covers how to set up your OpenLDAP directory to support 802.1x and WPA users. It assumes you have a working LDAP authentication setup ie. you have your e.g. Linux/Windows hosts authenticating against your LDAP database. If that is not so please consult LDAP authentication for Linux/UNIX/Mac OS X.

If you are only looking to authenticate WPA users that are in your OpenLDAP directory you may not need to follow steps in the following section. Following section is only for those people who want to e.g. dynamically assign users to a VLAN using RADIUS FilterID attributes or other RADIUS type of assignments . If you have no need for that please jump directly to OpenLDAP security.

OpenLDAP setup for 802.1x

1. Add the RADIUS schema to your LDAP configuration ie. if you look at the FreeRADIUS distribution you will find following file

RADIUS-LDAPv3.schema.gz
Uncompress it with
gzip -d RADIUS-LDAPv3.schema.gz

2. Copy the file to your LDAP schema directory and include it  in your slapd.conf ie.

include         /etc/ldap/schema/RADIUS-LDAPv3.schema

Make sure you include it on all LDAP servers ie. Master and Slave servers. If you don't your replication may not work if you have schemacheck set to on.

3. I recommend creating a separate LDAP subtree for 802.1x devices ie. unattended machines. This is not required if you want to provide access to all users. If so please go to following step. Otherwise create a subtree called cn=dot1x,dc=cs,dc=school,edu using a following LDIF

dn: cn=dot1x,dc=cs,dc=,dc=edu
objectClass: container
cn: dot1x
structuralObjectClass: container

To add this LDIF execute

ldapadd -ZZ -x -h ldap1.school.edu -D 'uid=root,cn=users,dc=cs,dc=school,dc=edu' -W

Then cut and paste the above LDIF.

4. Now you are ready to add 802.1x users. Let's say I have a hostname called myhost that I want to authenticate using 802.1x and password to authenticate is supersecret. You would add LDIF like this

dn: uid=myhost,cn=dot1x,dc=cs,dc=school,dc=edu
objectClass: top
objectClass: radiusprofile
objectClass: inetOrgPerson
cn: myhost
sn: myhost
uid: myhost
description: 802.1x user
radiusFilterId: "Enterasys:version=1:policy=Enterprise User"
userPassword: supersecret

Please note that userPassword attribute contains an unencrypted password. radiusFilterID is an additional piece of information that can be supplied to the switch. It depends from a switch to switch so check the docs for your switch. For example in this particular case Enterasys switch will assign a policy of "Enterprise User" to machine that authenticates as myhost.

OpenLDAP security

Since userPasswords are shown in clear text and since in general you don't want even password hashes exposed to casual observation you need to limit access to the userPassword attribute. To do so we'll create a separate user who has access to the userPassword attribute.

1. Create a user e.g. onex with password oursecret in your LDAP repository

2. Add the necessary access control rules to your slapd.conf or slapd.access.conf. For example I have

access to attrs=userPassword
        by dn="uid=onex,cn=users,dc=cs,dc=school,dc=edu" read
        by dn="uid=root,cn=users,dc=cs,dc=school,dc=edu" write
        by dn="uid=admin,cn=users,dc=cs,dc=school,dc=edu" write
        by anonymous auth
        by self write
        by * none

The above couple lines will allow only root, admin and user themself to read and modify the userPassword attribute for a particular entry. onex user we created will have only read privileges to the attribute.

Note: I tried to even further lock down the access so e.g. onex user could only see cn=dot1x,dc=cs,dc=school,dc=edu subtree however I haven't been successful. I tried adding following above the entry above e.g.

access to dn.sub="cn=dot1x,dc=cs,dc=unm,dc=edu" attrs=userPassword
      by dn="uid=onex,cn=users,dc=cs,dc=school,dc=edu" read 

With no success :-(. If you get this working please let me know.

FreeRADIUS setup

Now we need to configure FreeRADIUS to look up users

1. In /etc/freeradius/radiusd.conf find the modules {} section. Insert following

ldap ldap_1x {
                server = "ldap1.cs.school.edu"
                identity = "uid=onex,cn=users,dc=cs,dc=school,dc=edu"
                password = "oursecret"
                basedn = "dc=cs,dc=school,dc=edu"

                base_filter = "(objectclass=radiusprofile)"
                start_tls = yes
                # This is your Certificate Authority (CA) certificate
                tls_cacertfile = /etc/ldap/csca.crt
                tls_require_cert = "demand"
                # default_profile = "cn=radprofile,ou=dialup,o=My Org,c=UA"
                # profile_attribute = "radiusProfileDn"
                access_attr = "radiusFilterId"
                dictionary_mapping = ${raddbdir}/ldap.attrmap
                authtype = ldap

                ldap_connections_number = 5
                timeout = 4
                timelimit = 3
                net_timeout = 1
}

Note: If you don't care about setting up a separate tree for 802.1x users and don't want to add radiusFilterId attribute for all users who need access you can change access_attr to e.g.

access_attr = "uid"

That will allow anyone who has a uid attribute in their LDAP record (all users) to be allowed.

2. Go to

http://tldp.org/HOWTO/html_single/8021X-HOWTO/#confradius

Follow their EAP setup. The main difference is that HOWTO above uses a built-in passwords file instead of LDAP.

3. When you are done we'll just need to add ldap_1x to both authorize and authentication sections ie.

authorize {
        preprocess
        chap
        mschap
        suffix
        ldap_1x
        eap
}

authenticate {
        Auth-Type PAP {
                pap
        }
        Auth-Type MS-CHAP {
                mschap
        }
        eap
}

4. In /etc/freeradius/ldap.attrmap add

checkItem       User-Password                   userPassword

replyItem   Tunnel-Type                            radiusTunnelType
replyItem   Tunnel-Medium-Type             radiusTunnelMediumType
replyItem   Tunnel-Private-Group-Id        radiusTunnelPrivateGroupId

If you are using Samba and you have NT/LM password hashes you should also change the default mapping for LM-Password and NT-Password to following.

checkItem       LM-Password                     sambaLMPassword
checkItem       NT-Password                     sambaNTPassword

5. Start FreeRADIUS in foreground/debug mode and make sure things work :-)

radiusd -X -f


Different LDAP instances depending on source

Solution is from:
http://lists.freeradius.org/archives/freeradius-users/2005/04/frm00783.html
with my own modifications since it didn't work "out-of-the-box"

I'm trying to get ldap instances working on a per client basis.  For example, any authentication requests coming from host example1 should be authenticated using the ldap example1 instance, and example2 should be auth'd using the ldap example2 instance.

1) Define multiple ldap instances in the modules section of radiusd.conf, eg

ldap ldap_client1 {
.....
}
ldap ldap_client2 {
.....

2) In the authorize section of radiusd.conf, put e.g.

authorize {
        preprocess
        chap
        mschap
        Autz-Type LDAP1 {
           ldap_client1
        }
        Autz-Type LDAP2 {
           ldap_client2
        }
        eap
        files
}

3) Change the authenticate section e.g.

authenticate {
        Auth-Type PAP {
                pap
        }
        Auth-Type CHAP {
                chap
        }
        Auth-Type MS-CHAP {
                mschap
        }
        Auth-Type LDAP1 {
           ldap_client1
        }
        Auth-Type LDAP2 {
           ldap_client2
        }
        eap
}

3) Then in the users file put ie. default to ldap_client1. Otherwise if client comes from x.x.x.2 authenticate against ldap_client2

DEFAULT Client-IP-Address == "x.x.x.2", Auth-Type := LDAP2, Autz-Type := LDAP2

DEFAULT Auth-Type = "LDAP1"
    Fall-Through = Yes

DEFAULT Autz-Type = "LDAP1"

4) Please note that if you are doing WPA or 802.1x authentication you should NOT set Auth-Type. Let FreeRADIUS set Auth-Type to EAP. For example if you had an AP doing WPA your configuration would look something like this.

DEFAULT Client-IP-Address == "x.x.x.3", Autz-Type := LDAP2

DEFAULT Auth-Type = "LDAP1"
    Fall-Through = Yes

DEFAULT Autz-Type = "LDAP1"


EAP-TTLS vs. PEAP

Most clients these days ie. Windows XP and Mac OS X native 802.1x/WPA clients will prefer EAP-PEAP security method. They are fairly similar with the exception that TTLS gives you extra flexibility to specify what kind of authentication to do inside a TLS tunnel ie. PAPCHAP or MSCHAPv2. Why is that important you ask ? It is important depending what kind of password information you have stored in your LDAP database.
  1. In most cases you will have the MD5 or CRYPT hashes stored in userPassword attribute. If so you will have to use EAP-TTLS with PAP inner tunnel authentication
  2. If you have NT/LM hashes stored because you e.g. use LDAP as backend to Samba you can use either EAP-TTLS with MSCHAPv2 inner tunnel authentication (this is the default) or EAP-PEAP
  3. If you have passwords in plain text stored in userPassword you can use whatever authentication method you want ie. EAP-TTLS, EAP-PEAP or EAP-MD5.
If you have case 1. here is how to set up your clients for EAP-TTLS with PAP.

 Using PEAP with OpenLDAP

If you do need to use PEAP you will have to add NT/LM hashes to every user record in your LDAP directory. Easiest thing is to follow Samba LDAP set up. For examplehttp://www.ofb.net/~jheiss/samba/ldap.shtml. In short you will have to add the samba schema to your OpenLDAP configuration. Then use smbldap-tools to add necessary samba attributes to a user ie.

smbldap-usermod -a testuser

Once you have that you have to reset users' password with smbldap-passwd since you can't convert CRYPT/MD5 or SHA1 hashes to NT/LM hashes. Also make sure that ldap.attrmap file contains following two lines

checkItem       LM-Password                     sambaLMPassword
checkItem       NT-Password                     sambaNTPassword

Only other gotcha is that you cannot use LDAP bind to authenticate users with PEAP. PEAP will always do MSCHAPv2 authentication in the inner tunnel and RADIUS needs access to NT/LM hashes. Therefore you will need to set up a user that has access to sambaLMPassword and sambaNTPassword attributes. Please check OpenLDAP security at the top of this document ie. you will have to have to modify the permissions entry to read

access to attrs=userPassword,sambaNTPassword,sambaLMPassword
        by dn="uid=onex,cn=users,dc=cs,dc=school,dc=edu" read
....


ChilliSpot setup

Above set up will work nicely with ChilliSpot which is a hotspot captive portal.  The only difference is that you need to edit the hotspotlogin.cgi if you only have MD5/CRYPT password hashes in the LDAP database. You need to set

# Uncomment the following line if you want to use ordinary user-password
# for radius authentication. Must be used together with $uamsecret.
$userpassword=1;
$uamsecret="testing123";

In chilli.conf you will need to add the uamsecret that corresponds to the uamsecret above ie.

uamsecret testing123

In this case RADIUS will get password in clear (decoded with shared key) from the Chillispot and attempt LDAP bind. If you have NT/LM password ie. sambaNTpassword and sambaLMpassword attributes you don't have to do above.

Supplicant setup

Xsupplicant

You can get detail instructions on setting up Xsupplicant at

http://tldp.org/HOWTO/html_single/8021X-HOWTO/#xsupplicant

This is the xsupplicant.conf I used. Change items in red to

network_list = default
default_netname = default
first_auth_command = <BEGIN_COMMAND>dhclient %i<END_COMMAND>
logfile = /var/log/xsupplicant.log
allow_interfaces = eth0

default
{
  type = wired
  allow_types = eap_md5
  identity = <BEGIN_ID>myhost<END_ID>

  eap-md5 {
      username = <BEGIN_UNAME>myhost<END_UNAME>
      password = <BEGIN_PASS>supersecret<END_PASS>
  }

}

WPA Supplicant

You can also use WPA supplicant for both 802.1x wired and Wireless connections. To use wpa_supplicant for wired you have to use version 0.40+ and configure wpa_supplicant as follows

ctrl_interface=/var/run/wpa_supplicant
ctrl_interface_group=0
ap_scan=0
network={
        key_mgmt=IEEE8021X
        eap=MD5
        identity="XUSERNAME"
        password="XPASSWORD"
        eapol_flags=0
}

In some ways working with wpa_supplicant is easier than with Xsupplicant plus you have a single client for both Wired and Wireless connections.

To start it make sure you specify wired driver ie. -Dwired

/opt/wpa_supplicant  -B -w -c /etc/wpa_supplicant.conf -i eth0 -Dwired

Enable 802.1x on a Cisco switch

To set up Cisco switch for 802.1x I consulted following document

http://www.cisco.com/univercd/cc/td/doc/product/lan/cat2950/1216ea2/scg/swg8021x.htm#60637

In short this is what I did.

1. Enable 802.1x on a Cisco switch. You need to adjust the items in red to your own configuration
Switch# configure terminal
Switch(config)# aaa new-model
Switch(config)# aaa authorization network radius
Switch(config)# aaa authentication login admins local
Switch(config)# aaa authentication dot1x default group radius
Switch(config)# username admin password A-very-long-password
Switch(config)# dot1x system-auth-control
Switch(config)# radius-server host 192.168.1.38 auth-port 1812 acct-port 1813 key testing123
Switch(config)# end

After you are done doing this when you try to log back into the switch you will be prompted for a username and password. The same username and password are the ones you specified under username and password. Make sure that the shared secret (key) for the radius server corresponds to the entry in clients.conf in FreeRADIUS configuration.

2. To configure a particular port for 802.1x use following

Switch(config)# interface fastethernet0/1
Switch(config-if)# dot1x port-control auto
Switch(config-if)# end

3. If you have multiple hosts behind a port ie. there is a switch connected to a port you need to enable following when configuring an interface

Switch(config)# interface fastethernet0/1
Switch(config-if)# dot1x port-control auto
Switch(config-if)# dot1x multiple-hosts

4. If you are happy with the config make sure to copy the running config into the startup config ie.

Switch#copy running-config startup-config

Dynamically assigning VLANs on Cisco switches (NOT YET FULLY TESTED)

Now that you got 802.1x going you can dynamically assign users to a VLAN depending on how they authenticate. Please make sure that you added the proper mappings in the ldap.attrmap. If you did all you have to do is add these attributes to users/machines LDAP record ie. if you want to assign user to VLAN 2 you would add something like this

radiusTunnelMediumType: IEEE-802
radiusTunnelType: VLAN
radiusTunnelPrivateGroupId: 2

or fully

dn: uid=myhost,cn=dot1x,dc=cs,dc=school,dc=edu
objectClass: top
objectClass: radiusprofile
objectClass: inetOrgPerson
cn: myhost
sn: myhost
uid: myhost
description: 802.1x user
radiusFilterId: "Enterasys:version=1:policy=Enterprise User"
userPassword: supersecretradiusTunnelMediumType: IEEE-802
radiusTunnelType: VLAN
radiusTunnelPrivateGroupId: 2


Troubleshooting

1. My Cisco switch doesn't seem to be authenticating and I have set it up to point to the RADIUS server. 

Make sure you are have actually enabled dot1x ie.

Switch#show dot1x
Sysauthcontrol                    = Enabled 
Dot1x Protocol Version            = 1
Dot1x Oper Controlled Directions  = Both
Dot1x Admin Controlled Directions = Both 

Sysauthcontrol needs to show Enabled. If it doesn't make sure you enable it. Please check this step.

2. I am attempting PEAP authentication but I am getting

rlm_mschap: Told to do MS-CHAPv2 for xxx with NT-Password
   "FAILED: No NT/LM-Password".  

This can be due to following reasons
  1. You do not have NT/LM hashes stored in the LDAP database. Your LDAP directory has to have samba schema included in the configuration and NTPassword and LMPassword attributes populated for the user. Those are different than the userPassword attribute. There are two solutions to this problem
    1. Use TTLS with PAP inner tunnel authentication. To do so you will have to configure your clients.
    2. Populate NTPassword and LMPassword hashes by using e.g. smbldap-tools. You will not be able to convert your existing UNIX hashes to NT/LM.
  2. RADIUS user does not have access to NT/LM hashes. You can check here on how to enable that. Attributes you need access to are NTPassword and LMPassword.


| 1 comments ]

This document describes how to set up FreeRADIUS server in order to authenticate Windows XP network users transparently against Active Directory.

Refer to http://wiki.freeradius.org/guide/FreeRADIUS-Active-Directory-Integration-HOWTO

It is a step by step 'quick & dirty' guide to configure FreeRADIUS server, network Access Points and WindowsXP supplicants.

Principles

FreeRADIUS offers authentication via port based access control. A user can connect to the network only if its credentials have been validated by the authentication server. User credentials are verified by using special authentication protocols which belong to the 802.1X standard.
Network diagram
Refer to the graphic. Network access is only granted to the workstation if the user credentials have been authenticated by the FreeRADIUS server. Otherwise the switch port will be down for any network traffic. The RADIUS server is allowed to contact the domain controller for user authentication. Although the switch port is down, the workstation can communicate with the RADIUS server via an authentication protocol. The RADIUS server is able to check on the domain controller if the user exists and if its password is correct. If this is the case, the RADIUS server tells the switch to open the port and the user will get access to the network.

Prerequisites

The following components are required to install the access control solution:
  • A Linux/Unix server (only Linux is covered)
  • FreeRADIUS 3.0.x
  • Samba 3.0.x
  • Openssl
  • Cisco Catalyst Switch
  • Windows >= Win2K SP4 XP

Set up the Linux server

Linux must be configured to join a Windows domain. This is done by using the Samba file server which offers several interesting tools. The goal is not to create a Samba file server but only to use some tools which come with this server.
Samba server contains among others the following components:
  • Winbind, a daemon which permits connectivity to Windows –NT environment.
  • ntlm_auth, a tool which uses winbind for evaluating NTLM (NT Lan Manager) requests. This tool allows verifying user credentials on the domain controller and returns either a success or an error message.
Please have a look at your Linux box and check if Samba is already installed
rpm –qa | grep samba
Find the file smb.conf and open it with your preferred editor.
The file must contain the following lines:
In the [global] section
# workgroup = NT-Domain-Name or Workgroup-Name
  workgroup = XYZDOM  //the name of your domain

# Security mode. Most people will want user level
# security. See security_level.txt for details.
  security = ads


======== Share Definitions ========

 ...
 winbind use default domain = no
 password server = XYZSRV.XYZ-COMPANY.COM //your AD-server
 realm = XYZ-COMPANY.COM      //your realm
Verify the following lines in the [homes] section
comment = Home Directories
browseable = no
writable = yes
Next, find the file krb5.conf. Normally it should be found in /etc/krb5.conf.
Edit this file with the following information: (Watch out for case sensitivity)
[logging]
 default = FILE:/var/log/krb5libs.log
 kdc = FILE:/var/log/krb5kdc.log
 admin_server = FILE:/var/log/kadmind.log

[libdefaults]
 default_realm = EXAMPLE.COM
 dns_lookup_realm = false
 dns_lookup_kdc = false

[realms]
 EXAMPLE.COM = {
  kdc = kerberos.example.com:88
  admin_server = kerberos.example.com:749
  default_domain = example.com
 }

 XYZ-COMPANY.COM = {
  kdc = XYZSRV.XYZ-COMPANY.COM
 }

[domain_realm]
 .example.com = EXAMPLE.COM
 example.com = EXAMPLE.COM

[kdc]
  profile = /var/kerberos/krb5kdc/kdc.conf

[appdefaults]
 pam = {
  debug = false
  ticket_lifetime = 36000
  renew_lifetime = 36000
  forwardable = true
  krb4_convert = false
 }
Edit the file /etc/nsswitch.conf and add winbind at the end of each line shown below
passwd:     files winbind
shadow:     files winbind
group:      files winbind

protocols:  files winbind

services:   files winbind

netgroup:   files winbind

automount:  files winbind
Restart the machine.
Verify if the Samba service is running by typing
ps –ef | grep nmbd
ps –ef | grep smbd
Execute the following command line (you must be connected as root)
net join –U Administrator
Administrator is the name of the domain controller admin. Enter your password when prompted. If everything works fine, the Linux server has been registered to the Windows domain.
Verify now if the winbindd daemon is running
ps –ef | grep winbindd
Try next if you can authenticate a user from the domain
wbinfo –a user%password
The output should be something like the following
wbinfo –a example_user%mypassword
plaintext password authentication failed
error code was NT_STATUS_NO_SUCH_USER (0xc0000064)
error message was: No such user
Could not authenticate user example_user%mypassword with plaintext password
The error is absolutely normal in this case because there are no cleartext user credentials on the domain Controller (Active Directory) for this user
challenge/response password authentication succeeded
As cleartext authentication fails, wbinfo tries a challenge/response. If a challenge/response succeeds, the Linux server is configured correctly to authenticate users against Active Directory, however despite of the succes of this test, you may need to set some extra permissions on the winbindd_privileged directory (see below at WARNING)!
Let’s try to authenticate with NTLM, which is necessary for using FREERADIUS with Active Directory.
Type the following line
ntlm_auth –-request-nt-key –-domain=<your domain> –-username=<your username>
For example
ntlm_auth –-request-nt-key –-domain=XYZDOM –-username=example_user
You will be prompted for your password.
The command line returns
NT_STATUS_OK : Success (0x0)
If the username and password are the same as those stored in Active Directory.
Note that this mechanism is based on a challenge/response of the nt-key, a character string that has been encrypted with information taken from the username and password.
During this operation, no exchange of user information takes place. Everything is based upon a comparison of encrypted strings.

WARNING!!!

When called by radiusd (thus directly setting the challenge value) the ntlm_auth program needs permission to access winbindd's winbindd_privileged directory (somewhere under /var). Read access will usually be sufficient.
The radiusd.conf file sets the uid and gid your radiusd process will run as (by the user and group directives, respectively). The ntlm_auth process will have the same identity. If your filesystem containing the winbindd_privilegeddirectory supports POSIX ACLs, you can safely grant ntlm_auth the necessary permissions, in case your disribution's default setting were insufficient. If radiusd runs as the user radiusd for example, then you should use setfacl the following way
setfacl -m u:radiusd:rx winbindd_privileged
Or something similar. See http://www.suse.de/~agruen/acl/linux-acls/online/ or man setfacl for more information on POSIX ACLs!
(Under Debian Wheezy (and possibly other systems too), this is located in /var/run/samba/winbindd_privileged. Because /var/run is a symlink to /run, you won't find it with grep)

Installation of FreeRADIUS

Download first the latest source of Openssl (0.9.7f was used for this HOWTO).
Extract the source files from tarball
tar –zxvf openssl-0.9.7f.tar
Install openssl in /usr/local/openssl/
./config --prefix=/usr/local/openssl shared
make
make install
Download the latest version of FreeRADIUS from www.freeradius.org.
This document refers to version 3.0.0 of FreeRADIUS.
Install FreeRADIUS with the following option
./configure
make
make install
In order to get FreeRADIUS working, the following files must be configured:
  • clients.conf
  • mods-available/mschap
  • mods-available/eap
  • users

Configuration of clients.conf

Please refer to the documentation contained within clients.conf to authorize additional NAS to connect to the server.
Your entry should look something like this example
client 192.168.2.44 {
        secret                = 2!34r&dp0t
        shortname             = 192.168.2.44
        nastype               = cisco
}
The secret is a common password between the switch and RADIUS server. It is necessary to prevent the installation of wild access points. (Remember to set up the secret as well on your switch!)
Shortname is the IP address of your switch. (Watch out to use the correct one and not the IP address from this example!)
Nastype indicates the type of access point. In our case it is Cisco hardware.
If you have many NAS, it may be easier to specify a range and use the same shared secret for them all
client 192.168.2.0/24 {
        secret          = 2!34r&dp0t
        shortname       = network1
}

mods-available/mschap

Open this file and set the following
with_ntdomain_hack = yes
with_ntdomain_hack is necessary to correct an error due to the challenge/response and the format in which the user information is sent.
The following line is the most important one. It allows using the Windows Domain Controller (Active Directory) for authentication.
Uncomment it and set the correct path to the ntlm_auth binary
ntlm_auth = "/path/to/ntlm_auth --request-nt-key --username=%{%{Stripped-User-Name}:-%{%{User-Name}:-None}} --challenge=%{%{mschap:Challenge}:-00} --nt-response=%{%{mschap:NT-Response}:-00}"
You may also wish to add
--domain=%{mschap:NT-Domain}
When using machine authentication, you might want to try the following:
--username=%{%{mschap:User-Name}:-00}

mods-available/eap

In this file we specify the authentication method used by FreeRADIUS. We chose the PEAP (Protected EAP) method because it allows to use MSCHAPv2, a challenge/response protocol to authenticate against an Active Directory Windows Domain.
Replace the line default_eap_type = md5 with default_eap_type = peap.
Proceed to section
tls-config tls-common {
Replace the line random_file = ${certdir}/random with random_file = /dev/urandom.
For this tutorial the rest of the settings are correct, as snakeoil certificates will have been created as part of the build process.

Configuration of users

The configuration of this file is not necesary to enable authentication against the Active Directory, it is only necessary for advanced usage of FreeRADIUS.
One of this advanced features, (among others) is the case when we want to have some local users which are available even when Active Directory is not.
Open your raddb/users file with your favorite editor and add one line per local user
username1     Cleartext-Password := "user-password1", MS-CHAP-Use-NTLM-Auth := 0

username2     Cleartext-Password := "user-password2", MS-CHAP-Use-NTLM-Auth := 0

username3     Cleartext-Password := "user-password3", MS-CHAP-Use-NTLM-Auth := 0
and so on (Obviously, set your own local username and passwords).
Note the MS-CHAP-Use-NTLM-Auth := 0, in this line we are telling to the FreeRADIUS that i.e, username1 with password user-password1, will not be preprocessed by the ntlm_auth auxiliary program, this is, will not request the key to compare credentials against the Active Directory, but instead, compare against the users file of the freeradius configuration directory.
It is important to verify that the line
authorize {
    ...
    #  Read the 'users' file
    files   # <--- This one!
    ...
}
Is uncommented in the authorize section of the sites-avilable/inner-tunnel.

Configuration of the switch

This configuration applies to the Cisco Catalyst 3750. It can also be used for Catalysts 29xx. Please read the software configuration guide of your switch for any details!
Enter privileged EXEC mode of the switch.
Below are the commands to enable 802.1X port based authentication.
Activate AAA (Authentication, Authorization, Accounting)
enable aaa new-model
Create a list of authentication methods by using Radius group as default.
aaa authentication dot1x default group radius
Activate authorization for using dynamic VLAN assignment by Radius.
aaa authorization network default group radius
Configure parameters of Radius server. In this case we use IP 192.168.2.16 and the default ports 1812 and 1813
radius-server host 192.168.2.16 auth-port 1812 acct-port 1813 timeout 3
Configure the maximum number of retransmissions to the server for the requests (if there is no response of the server or if the server is slow).
radius server retransmit 3
Configure the shared secret between switch and Radius server. Radius authentication can not work if the password does not match with the one of the Radius server.
radius server key <mysharedsecret>
Please use the secret that you have specified in the clients.conf file.
Next we must configure each interface (port) to operate in 802.1X mode.
Repeat this procedure for each port that should do access control
configure terminal
(config)#interface FastEthernet1/0/12
(config-if)# switchport mode access
(config-if)# dot1x port-control auto
(config-if)# end
The command show dot1x< allows to check 802.1X settings.
Do not forget to save the configuration of your switch.
copy running-config startup-config

Configuration of the supplicant

This chapter illustrates the configuration of a Windows XP supplicant. No additional installation is needed to do this. Unfortunately you cannot use this authentication method for Windows 2000 operating systems. Microsoft’s patch (Q313664_W2K_SP4_X86_EN.exe) makes it only available for wireless interface adapters. Perhaps third-party supplicant software may solve this issue, but I did not find any at the time of writing this tutorial.
First, for enhanced security install the FreeRADIUS server CA certificate (the CA that signed the cert you installed in eap.conf).
Open the network configuration panel select the network card and enter the properties.
Select the « Authentication » tab.
Activate « Enable IEEE 802.1X authentication for this network » For EAP type, chose « Protected EAP » from the list and then click the « Properties » button.
Certificate validation is strongly recommended for wireless configurations, and optional for wired deployments.
Select « Validate server certificate » and check ONLY the CA for your FreeRADIUS server (the one you installed above). Also select « Connect to these servers » and enter the Common Name of the server certificate.
If you are configuring a wired ethernet interface, you can leave certificate verification off in your supplicants: just deselect « Validate server certificate ».
Either way, select « EAP-MSCHAP v2 » as authentication method. Click the « Configure » button next.
Check if « Automatically use my Windows logon name and password (and domain if any) » is activated. Otherwise the user will be prompted to authenticate after Windows login. IX Self-signed certificates
TLS and PEAP require both server and client certificates. To generate the requested certificates, it is recommended to use the script « CA.all » that comes with FREERADIUS. CA.all uses the configuration of the openssl.cnf file. It is possible to replace the certificates later by those obtained from a real certification authority.
Open the file openssl.cnf. It is located in /usr/local/openssl/ssl
Replace/add the following lines. Note that the config file contains the password < whatever >. It’s the certificate password.
Please replace the green items with the ones that correspond to your country and company
# req_extensions = v3_req

# The extensions to add to a certificate request

[ req_distinguished_name ]

countryName = Country Name (2 letter code)
countryName_default = LU
countryName_min = 2
countryName_max = 2

stateOrProvinceName = State or Province Name (full name)
stateOrProvinceName_default = Luxembourg

localityName = Locality Name (eg, city)
localityName_default = Luxembourg-city

0.organizationName = Organization Name (eg, company)
0.organizationName_default = XYZ

organizationalUnitName = Organizational Unit Name
organizationalUnitName_default = IT

commonName = Common Name (eg, YOUR name)
commonName_max = 64
commonName_default = administrator

emailAddress = Email Address
emailAddress_max = 40
emailAddress_default = operations@xyz.com

# SET-ex3 = SET extension number 3

[ req_attributes ]

challengePassword = A challenge password
challengePassword_min = 4
challengePassword_max = 20
challengePassword_default = whatever

unstructuredName = An optional company name
We are going to use this information 3 times when executing CA.all.
During the first pass, this information produces the root certificates. We can accept all default values while this pass.
The second pass produces the client certificates. We have to change the CommonName for the name of the client.
During the third pass, we have to change only the CommonName to the name of the server.
Before executing the script, check the following line in the CA.all script
echo "newreq.pem" | /usr/local/openssl/ssl/misc/CA.pl –newca
CA.all is located in the scripts subdirectory of FREERADIUS’ source directory. In case of doubt try the command.
find / -name CA.all
When executing CA.all, we produce the 9 following certificates
root.pem, root.p12, root.der
cert-clt.pem, cert-clt.p12, cert-clt.der
cert-srv.pem, cert-srv.p12, cert-srv.der
The server needs the files root.pem and cert.srv.pem in order to work with PEAP.
Move all the files to /etc/raddb/certs/. Do not forget the demoCA directory.
The original article was written by Charles Schwartz, Network Security Engineer.


| 0 comments ]

Jperf can be associated with Iperf to provide a graphical frontend written in Java.

The network link is delimited by two hosts running Iperf.

The quality of a link can be tested as follows:
- Latency (response time or RTT): can be measured with the Ping command.
- Jitter (latency variation): can be measured with an Iperf UDP test.
- Datagram loss: can be measured with an Iperf UDP test.

The bandwidth is measured through TCP tests.

To be clear, the difference between TCP (Transmission Control Protocol) and UDP (User Datagram Protocol) is that TCP use processes to check that the packets are correctly sent to the receiver whereas with UDP the packets are sent without any checks but with the advantage of being quicker than TCP.
Iperf uses the different capacities of TCP and UDP to provide statistics about network links.

Finally, Iperf can be installed very easily on any UNIX/Linux or Microsoft Windows system. One host must be set as client, the other one as server.


Here is a diagram where Iperf is installed on a Linux and Microsoft Windows machine.
Linux is used as the Iperf client and Windows as the Iperf server. Of course, it is also possible to use two Linux boxes.

screenshot Iperf bandwidth measure client server

Iperf tests:

no arg.
-b
-r
-d
-w
 
Default settings
Data format
Bi-directional bandwidth
Simultaneous bi-directional bandwidth
TCP Window size
 
-p, -t, -i
-u, -b
-m
-M
-P
-h
Port, timing and interval
UDP tests, bandwidth settings
Maximum Segment Size display
Maximum Segment Size settings
Parallel tests
help
Jperf:

no arg.
-d
-u, -b
Default settings
Simultaneous bi-directional bandwidth
UDP tests, bandwidth settings


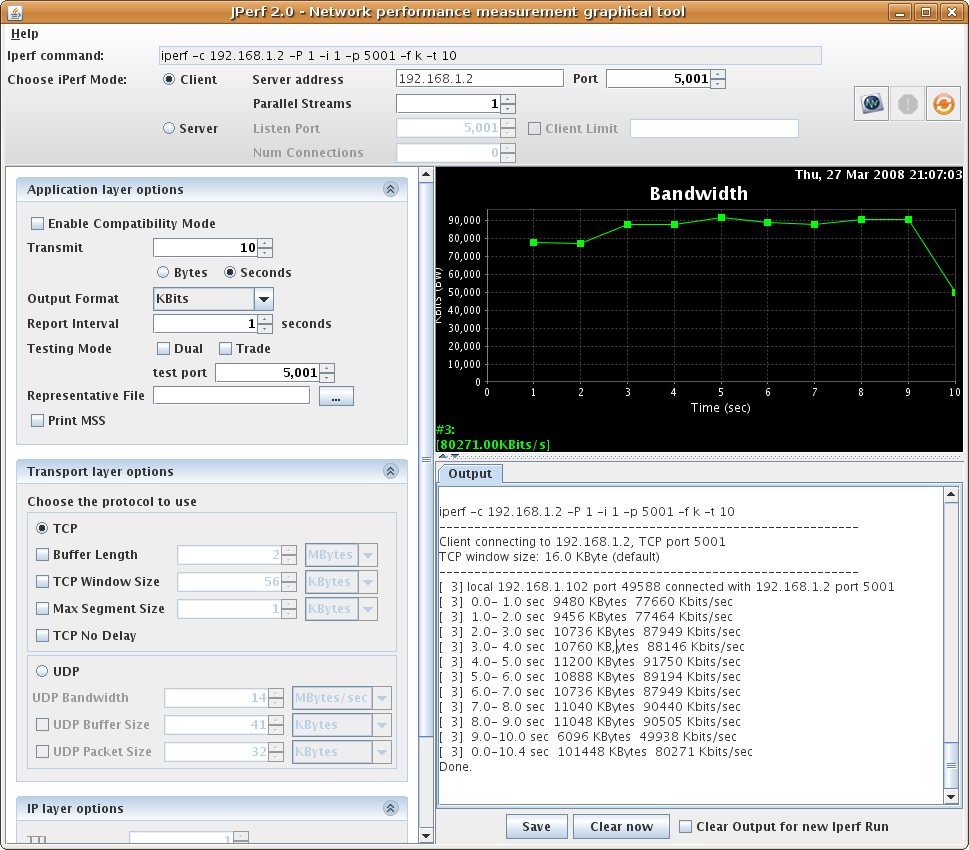
Default Iperf settings:
Also check "Jperf section.

By default, the Iperf client connects to the Iperf server on the TCP port 5001 and the bandwidth displayed by Iperf is the bandwidth from the client to the server.
If you want to use UDP tests, use the -u argument.
The -d and -r Iperf client arguments measure the bi-directional bandwidths. (See further on this tutorial)

Client side:

#iperf -c 10.1.1.1
------------------------------------------------------------
Client connecting to 10.1.1.1, TCP port 5001
TCP window size: 16384 Byte (default)
------------------------------------------------------------
[ 3] local 10.6.2.5 port 33453 connected with 10.1.1.1 port 5001
[ 3]   0.0-10.2 sec   1.26 MBytes   1.05 Mbits/sec


Server side:

#iperf -s
------------------------------------------------------------
Server listening on TCP port 5001
TCP window size: 8.00 KByte (default)
------------------------------------------------------------
[852] local 10.1.1.1 port 5001 connected with 10.6.2.5 port 33453
[ ID]   Interval          Transfer       Bandwidth
[852]   0.0-10.6 sec   1.26 MBytes   1.03 Mbits/sec


Data formatting: (-f argument)

The -f argument can display the results in the desired format: bits(b), bytes(B), kilobits(k), kilobytes(K), megabits(m), megabytes(M), gigabits(g) or gigabytes(G).
Generally the bandwidth measures are displayed in bits (or Kilobits, etc ...) and an amount of data is displayed in bytes (or Kilobytes, etc ...).
As a reminder, 1 byte is equal to 8 bits and, in the computer science world, 1 kilo is equal to 1024 (2^10).
For example: 100'000'000 bytes is not equal to 100 Mbytes but to 100'000'000/1024/1024 = 95.37 Mbytes.

Client side:

#iperf -c 10.1.1.1 -f b
------------------------------------------------------------
Client connecting to 10.1.1.1, TCP port 5001
TCP window size: 16384 Byte (default)
------------------------------------------------------------
[ 3] local 10.6.2.5 port 54953 connected with 10.1.1.1 port 5001
[ 3]   0.0-10.2 sec   1359872 Bytes   1064272 bits/sec


Server side:

#iperf -s
------------------------------------------------------------
Server listening on TCP port 5001
TCP window size: 8.00 KByte (default)
------------------------------------------------------------
[852] local 10.1.1.1 port 5001 connected with 10.6.2.5 port 33453
[ ID]   Interval          Transfer       Bandwidth
[852]   0.0-10.6 sec   920 KBytes   711 Kbits/sec


Top of the page

Bi-directional bandwidth measurement: (-r argument)

The Iperf server connects back to the client allowing the bi-directional bandwidth measurement. By default, only the bandwidth from the client to the server is measured.
If you want to measure the bi-directional bandwidth simultaneously, use the -d keyword. (See next test.)

Client side:

#iperf -c 10.1.1.1 -r
------------------------------------------------------------
Server listening on TCP port 5001
TCP window size: 85.3 KByte (default)
------------------------------------------------------------
------------------------------------------------------------
Client connecting to 10.1.1.1, TCP port 5001
TCP window size: 16.0 KByte (default)
------------------------------------------------------------
[ 5] local 10.6.2.5 port 35726 connected with 10.1.1.1 port 5001
[ 5]   0.0-10.0 sec   1.12 MBytes   936 Kbits/sec
[ 4] local 10.6.2.5 port 5001 connected with 10.1.1.1 port 1640
[ 4]   0.0-10.1 sec   74.2 MBytes   61.7 Mbits/sec


Server side:

#iperf -s
------------------------------------------------------------
Server listening on TCP port 5001
TCP window size: 8.00 KByte (default)
------------------------------------------------------------
[852] local 10.1.1.1 port 5001 connected with 10.6.2.5 port 54355
[ ID]   Interval          Transfer        Bandwidth
[852]   0.0-10.1 sec   1.15 MBytes   956 Kbits/sec
------------------------------------------------------------
Client connecting to 10.6.2.5, TCP port 5001
TCP window size: 8.00 KByte (default)
------------------------------------------------------------
[824] local 10.1.1.1 port 1646 connected with 10.6.2.5 port 5001
[ ID]   Interval          Transfer        Bandwidth
[824]   0.0-10.0 sec   73.3 MBytes   61.4 Mbits/sec


Top of the page

Simultaneous bi-directional bandwidth measurement: (-d argument)
Also check the "Jperf" section.

To measure the bi-directional bandwidths simultaneousely, use the -d argument. If you want to test the bandwidths sequentially, use the -r argument (see previous test).
By default (ie: without the -r or -d arguments), only the bandwidth from the client to the server is measured.

Client side:

#iperf -c 10.1.1.1 -d
------------------------------------------------------------
Server listening on TCP port 5001
TCP window size: 85.3 KByte (default)
------------------------------------------------------------
------------------------------------------------------------
Client connecting to 10.1.1.1, TCP port 5001
TCP window size: 16.0 KByte (default)
------------------------------------------------------------
[ 5] local 10.6.2.5 port 60270 connected with 10.1.1.1 port 5001
[ 4] local 10.6.2.5 port 5001 connected with 10.1.1.1 port 2643
[ 4] 0.0-10.0 sec 76.3 MBytes 63.9 Mbits/sec
[ 5] 0.0-10.1 sec 1.55 MBytes 1.29 Mbits/sec


Server side:

#iperf -s
------------------------------------------------------------
Server listening on TCP port 5001
TCP window size: 8.00 KByte (default)
------------------------------------------------------------
[852] local 10.1.1.1 port 5001 connected with 10.6.2.5 port 60270
------------------------------------------------------------
Client connecting to 10.6.2.5, TCP port 5001
TCP window size: 8.00 KByte (default)
------------------------------------------------------------
[800] local 10.1.1.1 port 2643 connected with 10.6.2.5 port 5001
[ ID]   Interval          Transfer       Bandwidth
[800]   0.0-10.0 sec   76.3 MBytes   63.9 Mbits/sec
[852]   0.0-10.1 sec   1.55 MBytes   1.29 Mbits/sec


Top of the page

TCP Window size: (-w argument)

The TCP window size is the amount of data that can be buffered during a connection without a validation from the receiver.
It can be between 2 and 65,535 bytes.
On Linux systems, when specifying a TCP buffer size with the -w argument, the kernel allocates double as much as indicated.

Client side:

#iperf -c 10.1.1.1 -w 2000
WARNING: TCP window size set to 2000 bytes. A small window size
will give poor performance. See the Iperf documentation.
------------------------------------------------------------
Client connecting to 10.1.1.1, TCP port 5001
TCP window size: 3.91 KByte (WARNING: requested 1.95 KByte)
------------------------------------------------------------
[ 3] local 10.6.2.5 port 51400 connected with 10.1.1.1 port 5001
[ 3]   0.0-10.1 sec   704 KBytes   572 Kbits/sec


Server side:

#iperf -s -w 4000
------------------------------------------------------------
Server listening on TCP port 5001
TCP window size: 3.91 KByte
------------------------------------------------------------
[852] local 10.1.1.1 port 5001 connected with 10.6.2.5 port 51400
[ ID]   Interval          Transfer       Bandwidth
[852]   0.0-10.1 sec   704 KBytes   570 Kbits/sec


Top of the page


Communication port (-p), timing (-t) and interval (-i):

The Iperf server communication port can be changed with the -p argument. It must be configured on the client and the server with the same value, default is TCP port 5001.
The -t argument specifies the test duration time in seconds, default is 10 secs.
The -i argument indicates the interval in seconds between periodic bandwidth reports.

Client side:

#iperf -c 10.1.1.1 -p 12000 -t 20 -i 2
------------------------------------------------------------
Client connecting to 10.1.1.1, TCP port 12000
TCP window size: 16.0 KByte (default)
------------------------------------------------------------
[ 3] local 10.6.2.5 port 58316 connected with 10.1.1.1 port 12000
[ 3]    0.0- 2.0 sec    224 KBytes    918 Kbits/sec
[ 3]    2.0- 4.0 sec    368 KBytes    1.51 Mbits/sec
[ 3]    4.0- 6.0 sec    704 KBytes    2.88 Mbits/sec
[ 3]    6.0- 8.0 sec    280 KBytes    1.15 Mbits/sec
[ 3]    8.0-10.0 sec    208 KBytes    852 Kbits/sec
[ 3]   10.0-12.0 sec   344 KBytes    1.41 Mbits/sec
[ 3]   12.0-14.0 sec   208 KBytes    852 Kbits/sec
[ 3]   14.0-16.0 sec   232 KBytes    950 Kbits/sec
[ 3]   16.0-18.0 sec   232 KBytes    950 Kbits/sec
[ 3]   18.0-20.0 sec   264 KBytes    1.08 Mbits/sec
[ 3]    0.0-20.1 sec   3.00 MBytes   1.25 Mbits/sec


Server side:

#iperf -s -p 12000
------------------------------------------------------------
Server listening on TCP port 12000
TCP window size: 8.00 KByte (default)
------------------------------------------------------------
[852] local 10.1.1.1 port 12000 connected with 10.6.2.5 port 58316
[ ID] Interval Transfer Bandwidth
[852]   0.0-20.1 sec   3.00 MBytes   1.25 Mbits/sec


Top of the page

UDP tests: (-u), bandwidth settings (-b)
Also check the "Jperf" section.

The UDP tests with the -u argument will give invaluable information about the jitter and the packet loss. If you don't specify the -u argument, Iperf uses TCP.
To keep a good link quality, the packet loss should not go over 1 %. A high packet loss rate will generate a lot of TCP segment retransmissions which will affect the bandwidth.

The jitter is basically the latency variation and does not depend on the latency. You can have high response times and a very low jitter. The jitter value is particularly important on network links supporting voice over IP (VoIP) because a high jitter can break a call.
The -b argument allows the allocation if the desired bandwidth.

Client side:

#iperf -c 10.1.1.1 -u -b 10m
------------------------------------------------------------
Client connecting to 10.1.1.1, UDP port 5001
Sending 1470 byte datagrams
UDP buffer size: 108 KByte (default)
------------------------------------------------------------
[ 3] local 10.6.2.5 port 32781 connected with 10.1.1.1 port 5001
[ 3]   0.0-10.0 sec   11.8 MBytes   9.89 Mbits/sec
[ 3] Sent 8409 datagrams
[ 3] Server Report:
[ 3]   0.0-10.0 sec   11.8 MBytes   9.86 Mbits/sec   2.617 ms   9/ 8409   (0.11%)


Server side:

#iperf -s -u -i 1
------------------------------------------------------------
Server listening on UDP port 5001
Receiving 1470 byte datagrams
UDP buffer size: 8.00 KByte (default)
------------------------------------------------------------
[904] local 10.1.1.1 port 5001 connected with 10.6.2.5 port 32781
[ ID]   Interval         Transfer        Bandwidth         Jitter        Lost/Total Datagrams
[904]   0.0- 1.0 sec   1.17 MBytes   9.84 Mbits/sec   1.830 ms   0/ 837   (0%)
[904]   1.0- 2.0 sec   1.18 MBytes   9.94 Mbits/sec   1.846 ms   5/ 850   (0.59%)
[904]   2.0- 3.0 sec   1.19 MBytes   9.98 Mbits/sec   1.802 ms   2/ 851   (0.24%)
[904]   3.0- 4.0 sec   1.19 MBytes   10.0 Mbits/sec   1.830 ms   0/ 850   (0%)
[904]   4.0- 5.0 sec   1.19 MBytes   9.98 Mbits/sec   1.846 ms   1/ 850   (0.12%)
[904]   5.0- 6.0 sec   1.19 MBytes   10.0 Mbits/sec   1.806 ms   0/ 851   (0%)
[904]   6.0- 7.0 sec   1.06 MBytes   8.87 Mbits/sec   1.803 ms   1/ 755   (0.13%)
[904]   7.0- 8.0 sec   1.19 MBytes   10.0 Mbits/sec   1.831 ms   0/ 850   (0%)
[904]   8.0- 9.0 sec   1.19 MBytes   10.0 Mbits/sec   1.841 ms   0/ 850   (0%)
[904]   9.0-10.0 sec   1.19 MBytes   10.0 Mbits/sec   1.801 ms   0/ 851   (0%)
[904]   0.0-10.0 sec   11.8 MBytes   9.86 Mbits/sec   2.618 ms   9/ 8409  (0.11%)


Top of the page

Maximum Segment Size (-m argument) display:

The Maximum Segment Size (MSS) is the largest amount of data, in bytes, that a computer can support in a single, unfragmented TCP segment.
It can be calculated as follows:
MSS = MTU - TCP & IP headers
The TCP & IP headers are equal to 40 bytes.
The MTU or Maximum Transmission Unit is the greatest amount of data that can be transferred in a frame.
Here are some default MTU size for different network topology:
Ethernet - 1500 bytes: used in a LAN.
PPPoE - 1492 bytes: used on ADSL links.
Token Ring (16Mb/sec) - 17914 bytes: old technology developed by IBM.
Dial-up - 576 bytes

Generally, a higher MTU (and MSS) brings higher bandwidth efficiency

Client side:

#iperf -c 10.1.1.1 -m
------------------------------------------------------------
Client connecting to 10.1.1.1, TCP port 5001
TCP window size: 16.0 KByte (default)
------------------------------------------------------------
[ 3] local 10.6.2.5 port 41532 connected with 10.1.1.1 port 5001
[ 3]   0.0-10.2 sec   1.27 MBytes   1.04 Mbits/sec
[ 3] MSS size 1448 bytes (MTU 1500 bytes, ethernet)
Here the MSS is not equal to 1500 - 40 but to 1500 - 40 - 12 (Timestamps option) = 1448

Server side:

#iperf -s
Top of the page

Maximum Segment Size (-M argument) settings:

Use the -M argument to change the MSS. (See the previous test for more explanations about the MSS)

#iperf -c 10.1.1.1 -M 1300 -m
WARNING: attempt to set TCP maximum segment size to 1300, but got 536
------------------------------------------------------------
Client connecting to 10.1.1.1, TCP port 5001
TCP window size: 16.0 KByte (default)
------------------------------------------------------------
[ 3] local 10.6.2.5 port 41533 connected with 10.1.1.1 port 5001
[ 3]   0.0-10.1 sec   4.29 MBytes   3.58 Mbits/sec
[ 3] MSS size 1288 bytes (MTU 1328 bytes, unknown interface)


Server side:

#iperf -s
Top of the page

Parallel tests (-P argument):

Use the -P argument to run parallel tests.

Client side:

#iperf -c 10.1.1.1 -P 2
------------------------------------------------------------
Client connecting to 10.1.1.1, TCP port 5001
TCP window size: 16.0 KByte (default)
------------------------------------------------------------
[ 3] local 10.6.2.5 port 41534 connected with 10.1.1.1 port 5001
[ 4] local 10.6.2.5 port 41535 connected with 10.1.1.1 port 5001
[ 4]     0.0-10.1 sec   1.35 MBytes   1.12 Mbits/sec
[ 3]     0.0-10.1 sec   1.35 MBytes   1.12 Mbits/sec
[SUM]  0.0-10.1 sec   2.70 MBytes   2.24 Mbits/sec


Server side:

#iperf -s
Top of the page


Iperf help:

#iperf -h
Usage: iperf [-s|-c host] [options]
iperf [-h|--help] [-v|--version]

Client/Server:
-f
-i
-l
-m
-p
-u
-w
-B
-C
-M
-N
-V
--format
--interval
--len
--print_mss
--port
--udp
--window
--bind
--compatibility
--mss
--nodelay
--IPv6Version
[kmKM]
#
#[KM]
 
#
 
#[KM]
"host"
 
#
 
 
format to report: Kbits, Mbits, KBytes, MBytes
seconds between periodic bandwidth reports
length of buffer to read or write (default 8 KB)
print TCP maximum segment size (MTU - TCP/IP header)
server port to listen on/connect to
use UDP rather than TCP
TCP window size (socket buffer size)
bind to "host", an interface or multicast address
for use with older versions does not sent extra msgs
set TCP maximum segment size (MTU - 40 bytes)
set TCP no delay, disabling Nagle's Algorithm
Set the domain to IPv6
Server specific:
-s
-U
-D
--server
--single_udp
--daemon


run in server mode
run in single threaded UDP mode
run the server as a daemon
Client specific:
-b
-c
-d
-n
-r
-t
-F
-I
-L
-P
-T
--bandwidth    
--client
--dualtest
--num
--tradeoff
--time
--fileinput
--stdin
--listenport
--parallel
--ttl
#[KM] 
"host"
 
#[KM]
 
#
"name"
 
#
#
#
for UDP, bandwidth to send at in bits/sec (default 1 Mbit/sec, implies -u)
run in client mode, connecting to "host"
Do a bidirectional test simultaneously
number of bytes to transmit (instead of -t)
Do a bidirectional test individually
time in seconds to transmit for (default 10 secs)
input the data to be transmitted from a file
input the data to be transmitted from stdin
port to recieve bidirectional tests back on
number of parallel client threads to run
time-to-live, for multicast (default 1)
Miscellaneous:
-h
-v
--help
--version
                  
 
print this message and quit
print version information and quit
Top of the page


JPERF

Jperf is a graphical frontend for Iperf written in Java.

1. Installation:

Download Jperf.

Linux

Uncompress the downloaded file:

#tar -xvf jperf2.0.0.zip
Launch Jperf.

#cd jperf2.0.0
#./jperf.sh
If you have the following message, it means that you need to install Iperf with: "apt-get install iperf"

Iperf is probably not in your Path!
Please download it here 'http://dast.nlanr.net/Projects/Iperf/'
and put the executable in your PATH environment variable.


jperf default settings

Microsoft Windows

Uncompress the downloaded file with your favorite program.
Access the uncompressed folder called by default "jperf2.0.0" and double-click on "jperf.bat".
Note that the iperf utility is already present in the /bin folder.
2. Examples:

Default settings, bandwidth measurement:
Also check "Iperf" section for more details.

- Linux client:

jperf default settings

- Windows server:

jperf default settings

Top of the page     Jperf


Simultaneous bi-directional bandwidth measurement:
Also check "Iperf" section for more details.

- Linux client:

jperf bidirectionnal bandwidth measurement

- Windows server:

jperf bidirectionnal bandwidth measurement

Top of the page     Jperf

Jitter measurement:
Also check "Iperf" section for more details.

- Linux client:

jperf jitter measurement

- Windows server:

jperf jitter measurement